DCOM Configuration Guide
April 18, 2018DCOM automation versus COM
Usually, automation of Copper Mountain Technologies instruments is achieved on the same computer which is running the VNA applications. Such functionality can be readily achieved using COM, or ActiveX automation. Nothing is required for automation of the instrument other than the PlanarR54.exe application and its Programming Manual. When you install the application, on the last page of the wizard there’s an option to register the COM server. If this box is checked and you see a confirmation dialogue pop up, you are ready to begin programming.
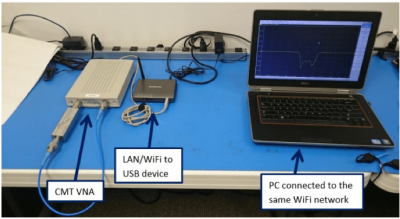
However, in some instances it is desirable to execute the VNA application on one PC and to host the automation environment on a second Windows PC. This configuration requires use of Distributed COM, or DCOM. The main challenge related to DCOM versus COM is getting Windows firewall and security settings, as well as LAN settings, to cooperate. It will probably be easiest to begin developing your application on the same machine that is running the VNA application (via a local COM interface) and once that’s working, move toward automation over your network via DCOM.
This document captures several of the important steps necessary for configuring both Windows PCs involved with the DCOM scenario: the “Server” PC (running the VNA application) and the “Client” (which issues commands to, and retrieves results from, the Server).
Firewall and Security Settings
Unless otherwise noted, all instructions in this section pertain to both the Server and Client machines. Windows 7 was used to create the steps and screenshots, but a similar process is involved for other versions of Windows.
- Disable Windows firewall or any third-party firewalls you may have running on either machine
- Make sure an Administrator account exists on both machines with the exact same username and password. Log in to both machines with the same credentials.
- If a “Domain” is being used on both machines, this is sufficient to synchronize the credentials. If Workgroups are being used, instead, we suggest joining both PCs to a common “Homegroup”.
- Edit the settings in Component Services related to DCOM:
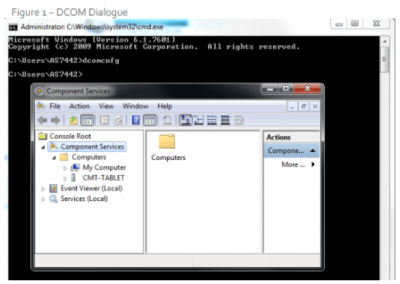
At a command prompt, type ‘dcomcnfg’ to launch the Component Services dialogue
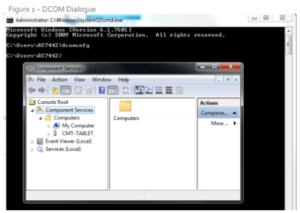
Figure 1: DCOM Dialogue
- Right click on “My Computer”, choose Properties, and then:
- On “Default Properties” tab, make sure “Enable Distributed COM on this computer” is checked, set Default Authentication Level = Connect (or None), and set Default Impersonation Level = Identify
- On “COM Security” tab, under Access Permissions, click Edit Default, make sure ‘Everyone’, ‘Administrators’, and SYSTEM are present and have both Local and Remote Access permissions. Under Launch and Activation Permissions, do the same, and make sure all four settings are enabled for these same users.
- Change specific settings for the VNA application’s object (e.g. Planar804.Application)
- Find the instrument’s object in the list under DCOM Config (See Figure 2)
- If the instrument’s object is not shown in the list of objects,, try running ‘mmc comexp.msc /32’ instead (this is a Windows issue to do with 64 bit machines and 32 bit applications).
Right click the object and choose properties. On the General tab, confirm Authentication level = Default. On the location tab of the Server PC (the PC connected to the instrument) make sure the box “Run application on this computer” is checked; on the client PC (from which automation will be performed) make sure only the Run application on the following computer” box is checked, with the computer name of the server entered in the field below. On the Security tab, Launch and Access permissions should both = Use Default, and on the Identity tab select “The interactive user”.
Since “Run application on this computer” is disabled on the PC from which automation is performed, it shouldn’t be necessary to specify the IP address or machine name of the remote machine in your function call.
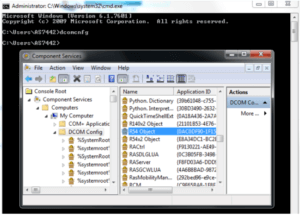
Figure 2: DCOM configuration of VNA application’s object
Other Settings
It may also be helpful to go to Control Panel > System and Security > Allow Remote Access, then on the Advanced tab, chose Performance settings and to confirm Data Execution Prevention is set = Essential Windows programs and services only. Also try going to Control Panel > Network and Internet > Network and Sharing Center, looking for Change Advanced Sharing Settings, expanding “Home or Work” and near the bottom under Password protected sharing, and selecting “Turn off password protected sharing”.
These last two steps may or may not be required, but the security and application-related settings in the preceding section absolutely must be setup, otherwise the authentication settings and permissions will prevent it working at all. We hope you have found this guide to be helpful. If there are any other settings you are wondering about please contact us at support@3.141.29.121 and we will help you get everything up and running!
References
- What is the Workgroup & How to Change it in Windows?
http://www.7tutorials.com/how-change-workgroup-windows-7 - How To Use Dcomcnfg for a Visual Basic DCOM Client/Server Application
http://support.microsoft.com/kb/268550/EN-US - Setting Process-Wide Security Using DCOMCNFG
http://msdn.microsoft.com/en-us/library/ms678426(VS.85).aspx - How can I utilize MATLAB on a remote machine as a Distributed COM (DCOM) server?
http://www.mathworks.com/matlabcentral/answers/95647-how-can-i-utilize-matlab-on-a-remotemachine-as-a-distributed-com-dcom-server - SAMPLE: A Simple DCOM Client Server Test Application
http://support.microsoft.com/kb/259011


Comments (3)