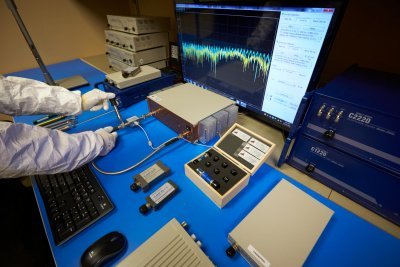
Calibration Types and Considerations
April 19, 2018Introduction
One of the most frequently asked questions we receive at Copper Mountain Technologies’ sales and support departments goes something like this: “What about calibration?”
It’s an unfortunate reality that in the English language, Calibration has two completely distinct definitions. The first relates to checking out the instrument periodically to make sure it is operating within its specifications. “Performance test” is the procedure by which the analyzer performance is verified, typically annually.
The second meaning is to do with Measurement or User calibration, a collection of techniques by which measurement accuracy is maximized and made to exclude elements of the system from those measurements (such as cables, adapters and the like).
In this application note, we discuss both meanings of calibration as related to Copper Mountain Technologies’ Vector Network Analyzers (VNAs). First, we describe Annual Calibration and then later we discuss measurement calibration.
Meaning 1: Annual Calibration
The objective of verifying performance of test equipment regularly is to ensure measurement performance is within published specifications. Testing procedures for CMT instruments are well-aligned with established industry processes. For example, VNA calibration procedures conventionally include measurement of RF output power, frequency accuracy, harmonic distortion, as well as S-parameter measurement accuracy.
Copper Mountain Technologies recommends a 12-month calibration interval for all VNAs and Automatic Calibration Modules (ACMs) we produce; however, the actual calibration interval is defined by the end user organization’s quality policy and can be extended based on the nature of the instruments’ use.
Copper Mountain Technologies’ Calibration Laboratory
Copper Mountain Technologies’ Indianapolis-based calibration laboratory is accredited in accordance with the recognized international standard ISO/IEC 17025 (2005) and meets the requirements of ANSI/NCSL Z540-1994-1, ISO/IEC 9001:2008. All reference standards and equipment of the laboratory are traceable to National Institute of Standards and Technology (NIST) or international equivalents.
Our calibration certificate and scope, issued by ANSI-ASQ Accreditation Board (ANAB), can be accessed at anab.org using the accreditation number below.
Third-Party Laboratories
Should you prefer to perform annual testing yourself, or use a third party, Copper Mountain Technologies’ calibration experts are here to help. Any laboratory with sufficient RF measurement experience and capability can perform the maintenance needed for annual verification and calibration of our VNAs.
Performance test manuals for many of our instruments can be freely accessed in the Download the Software section of our website. Please contact us for details about or questions on using these procedures.
Additionally, a VNA Performance Test (VNAPT) software application is available for third party laboratories without restriction. Use of VNAPT to execute performance tests is optional, but the software is designed to automate and streamline VNA performance testing, including generation of test reports automatically.
Copper Mountain Technologies has worked extensively with calibration service providers at many ISO17025-accredited and Z540-1 compliant calibration labs across the United States and around the world. A sampling of US laboratories able to calibrate CMT VNAs is included on our website for your convenience.
For locations or laboratories not listed there, please contact us or your local distributor for recommended calibration options.
Meaning 2: Measurement Calibration
Just as weight measurements with a scale are more accurate just after it’s zeroed, or “tared”, measurements with a vector network analyzer are most accurate after it has been newly calibrated. But here we mean a different thing than in the previous section; measurement calibration is a procedure done regularly (often daily) to provide measurement offsets and adjustments used by the analyzer to maximize accuracy.
In this chapter, we describe reasons for calibration, as well as the basic principles and processes involved in calibrating a VNA.
Error sources
At a high level, measurement calibration of the VNA serves two purposes:
- removing the effects of the “fixture”, which includes everything between the VNA port(s) other than the device under test, and
- correcting the systematic errors within the analyzer itself.
Of course, if the VNA’s imperfections are small compared with the required measurement accuracy, and to the extent we can ignore effects of the fixture (analogous to an empty container on a scale), it is possible to forgo calibration for some applications.
However, the gap between typical accuracy requirements and the uncalibrated performance of commercially-available instruments makes calibration a common first step in the use of any VNA.
Imperfections of the fixture
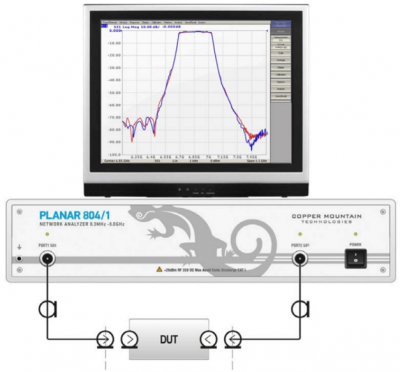
Measurements performed by an uncalibrated VNA are measurements of everything between its ports, usually including adapters and cables, and sometimes including amplifiers, PCB traces, probes, or other components, as well as the Device Under Test (the DUT).
In a perfect world, we could connect the VNA’s test port(s) directly to the device under test, eliminating the fixture completely. However, with the exception of Copper Mountain Technologies’ uniquely compact, patented 1-port reflectometers, this is rarely a possibility.
By calibrating at the interface(s) of the DUT, we mathematically remove the losses and delays of the fixture from our measurements, so we are left with measurements of the DUT alone.
Imperfections of the VNA
Even in a very well-built VNA, imperfections exist to some degree. For example, the port(s) might not have exactly the correct input or output impedance (often 50Ω) and phase (0 degrees) at all frequencies.
Fortunately, since such imperfections tend to be consistent over time, calibration can determine and mathematically remove their effects, allowing for measurement accuracies corresponding to a more ideal instrument.
Calibration standards and definitions
There are many variants of VNA calibration procedure, but they all involve these three basic components:
- Knowledge of the true response of one or more calibration standards–the “right answer”. This is referred to as a standard’s definition.
- Measurement of these standards with the VNA, via the fixture.
- Estimating and applying Corrections to eliminate the differences between (1) and (2).
1. Definition of standards
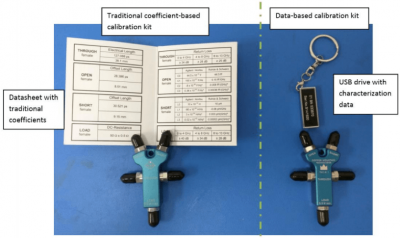
The manufacturer of a given collection, or kit, of standards will provide estimates of its standards’ true responses. The “Short” calibration standard is defined by four coefficients which determine the inductance to third order accuracy vs. frequency and a fixed delay which represents the time delay between the actual short circuit and the connector. The “Open” is similarly defined but as a capacitance vs. frequency. The “Thru” calibration standard is defined merely by its delay from connector to connector. These are provided to the VNA so it can know what the “right answer” should have been when in the next step, these standards are measured.
Copper Mountain Technologies’ VNA apps include a pre-populated list of kits with their standards’ definitions. If the kit you’re using is among those provided, this step simplifies to selecting the name of the kit being used from this list; otherwise, it’s fairly straightforward to create a new kit definition in the software by entering the coefficients given from the data sheet for the calibration standard being used.
2. Measurement of standards
The most common calibration standard types are the Short, Open, Load, and Thru, and the most common calibration procedure is accordingly abbreviated as “SOLT” calibration (the “Thru” standard is used for calibration of transmission measurements, so it’s unnecessary when calibrating a 1-port VNA).
Executing the calibration procedure is simply a matter of connecting, one-at-a-time, the various calibration standards to each port’s fixture and running a calibration measurement while each is installed.
For maximum calibration accuracy, it’s important to:
- allow the VNA, its fixture, and the standards themselves to acclimate to the ambient temperature environment,
- use a torque wrench to connect each of the standards, and
- handle the standards with care, and clean them when necessary, as hand oils and dust can have a significant effect on the measurement results.
3. Computation of corrections
Once all the standards have been measured, simply click the apply button and the VNA will take care of the rest!
Conclusion
Now that you understand both meanings of the term “Calibration” in the context of CMT VNAs, we hope you are able to answer the question originally posed: “What about calibration?”
For long term monitoring of instrument performance, Annual Calibration (or in any case, periodic) is used. The main goal of this procedure is to find faults or shortcomings with the instrument; to avoid taking erroneous measurements when accuracy is important. For daily, or measurement calibration, users have a variety of options in CMT software including SOLT, SOLR, TRL, and Waveguide calibration, and more. All these techniques rely on measurement of a standard with known properties or known differences to another standard. Measurement calibration can be done as often as the user desires, or as often as required to achieve a particular measurement accuracy.



Comments (38)